Talk to us,Get a Solution in 20 minutes
Please let us know any requirements and specific demands,then we work out the solution soonest and send back it for free.
Please let us know any requirements and specific demands,then we work out the solution soonest and send back it for free.
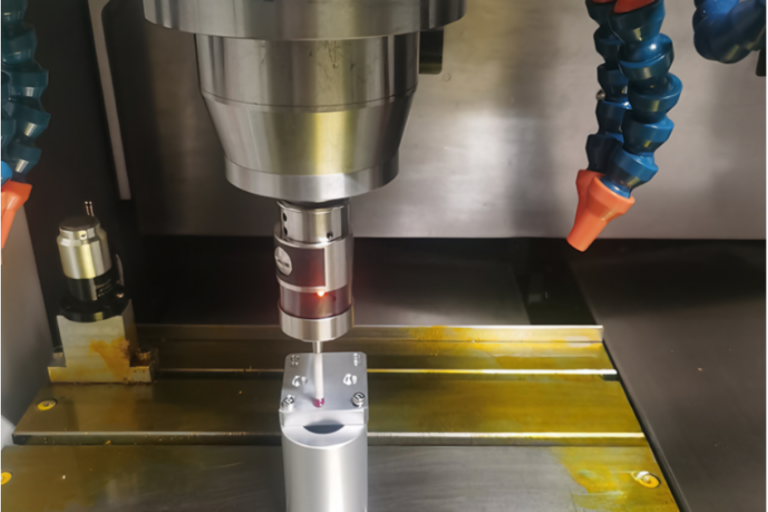
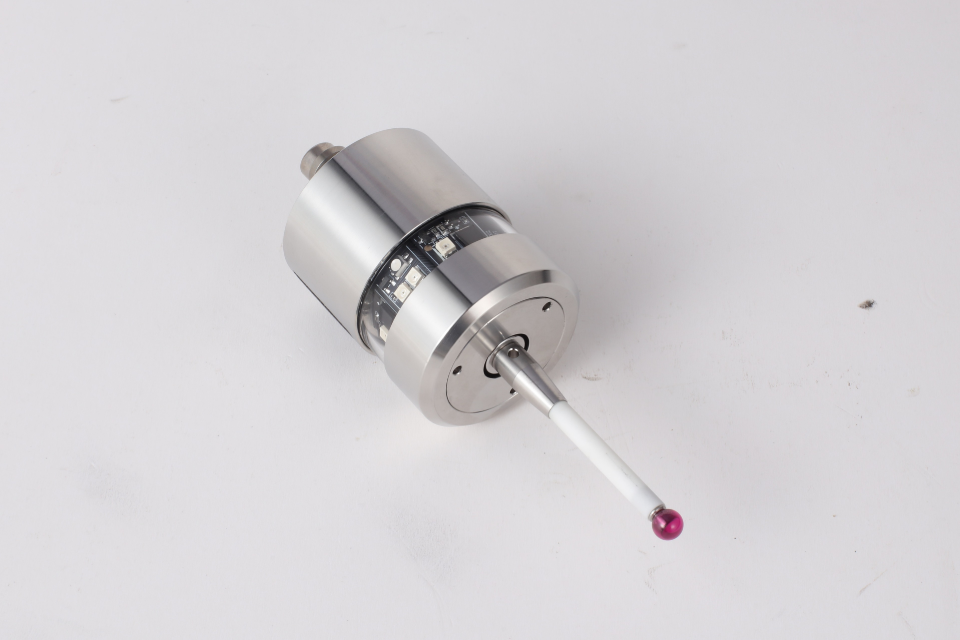
A CNC probe is a precision switch with a stylus (usually a ruby-tipped ball) that the machine uses to locate, measure, and verify parts and fixtures. It tells the control exactly where things are so your programs start from the right place—and stay there.
Touch a face, an edge, a bore, or a boss; the control calculates the true zero for X/Y/Z. Goodbye manual edge-finder, hello minutes saved per setup—especially when using a reliable CNC touch probe system.
If stock or a vise is slightly twisted, the probe finds the angle and updates the coordinate system so your toolpaths track reality, not wishful thinking.
From pockets and webs to dowel holes and bosses, the probe measures multiple points and splits the difference to get a microns-level centerline, which is exactly what modern CNC probing systems are designed to do well.
Mid-cycle, the probe measures critical features and can adjust tool wear or stop the cycle before scrap multiplies. It’s SPC at the spindle.
Forgot to load the correct soft jaws? Clamp shift during second op? The probe catches it. Your first-article succeeds more often—one reason shops invest in wireless CNC probes.
Setup time collapses: Especially in high-mix, low-volume work, probing turns half-shifts into minutes.
First-part yield climbs: You make a good part sooner—less firefighting.
Lights-out becomes realistic: The machine can self-check between ops without a human standing by, particularly when paired with stable radio CNC probing solutions.
Data, not gut feel: Measured values feed your control and your process sheets.
| Link Type | When to Pick It | What to Watch |
|---|---|---|
| Infrared (IR) | Clear line-of-sight VMCs; battery-sipping, simple | Chips/doors can shadow the beam |
| Radio | 5-axis, horizontals, big enclosures; penetrates coolant & doors | Manage pairing; slightly more power |
| Wired | EDMs, noisy EMI environments, tiny machines | Cable routing/strain relief, travel limits |
Rule of thumb: horizontals or 5-axis → radio; compact VMC with clean receiver window → IR; EDM or heavy EMI → wired.
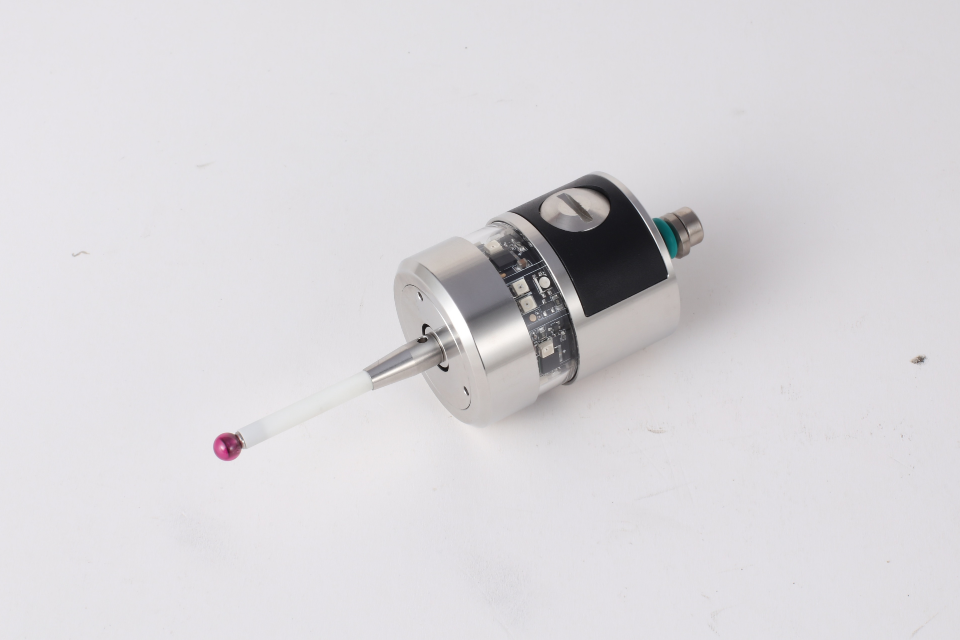
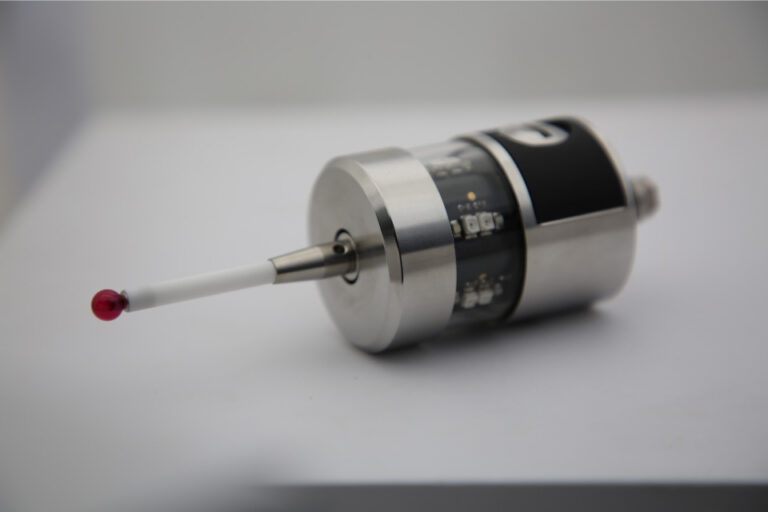
Kinematic seat: Three precision contact pairs lock the stylus into the same position after every trigger.
Ruby ball tip: Hard, low friction, predictable contact geometry.
Sealed body: O-rings and wipers keep coolant out; balanced design survives toolchanges.
Electronics: The switch closure is filtered/debounced so you get a crisp, repeatable signal (often within a few microns).
3C / electronics: Zero thin-wall parts without crushing; confirm tiny bosses before micro-endmills finish.
Auto parts: Measure bores/bosses, keep bolt patterns concentric across cavities.
Aerospace: Align multi-op parts after every flip; catch thermal drift on long finish passes.
Mold & die: Pick up electrodes and cavity datums; re-touch features after benching or spotting.
Job shops: Standardize chaos—every job starts with the same safe, proven probing routine supported by modern CNC probe hardware.
Home & warmup: Prove machine zero; spindle warmup if cold.
Stock measurement: Probe top (Z0), two X/Y faces for squareness and size.
Rotation: Touch a long edge or slot → set angle.
Primary datums: Bore/boss center, critical faces.
Log & act: Record deviations to variables; update tool wear or alarm if out of band.
Keep it boring: one master program calls clean subroutines (measure_face, measure_bore, set_rotation). Operators love predictability.
Save 20 minutes per setup × 3 setups/day = 1 hour/day.
At $30–$60/hr, that’s $7.5k–$15k/year (250 days) before counting scrap reduction and rework avoidance.
Most probes pay back in weeks, not years.
False triggers from chips: Air blast + “double-touch to confirm.”
Blind spots (IR): Move receiver or add a repeater; avoid parking behind tool racks.
Radio pairing roulette: Label pairs; keep a two-step “pair & test” card at the control.
Wired cable fatigue: High-flex cable, generous bend radius, real strain relief.
After any bump: Re-qualify the stylus—cheaper than chasing phantom microns.
Daily: Wipe ruby, quick visual on LED/status.
Weekly: 10 touches on a gauge point; check spread.
Monthly: Inspect O-rings, stylus threads; re-qualify length/radius.
Crash: Replace stylus first; investigate mounts second.