Fale connosco, obtenha uma solução em 20 minutos
Por favor, informe-nos sobre quaisquer requisitos e exigências específicas, para que possamos encontrar a solução o mais rapidamente possível e enviá-la de volta gratuitamente.
Por favor, informe-nos sobre quaisquer requisitos e exigências específicas, para que possamos encontrar a solução o mais rapidamente possível e enviá-la de volta gratuitamente.
Se já passou algum tempo numa fresadora CNC, conhece este momento: está prestes a iniciar um trabalho, a sua morsa está aparafusada... mas será que está mesmo em esquadro com os eixos da máquina? Pode passar algum tempo com indicadores, apalpadores, pedras e localizadores de arestas - e alguns maquinistas experientes podem tornar-se muito bons com essas ferramentas - mas há uma forma mais inteligente que combina confiança, repetibilidade e automação: utilizar uma sonda CNC para enquadrar o seu torno.
Nesta publicação, iremos explorar não só como enquadrar um torno com uma sonda CNC, mas também porque é que vale a pena fazê-lo e como eleva o seu fluxo de trabalho para além das técnicas manuais. Iremos também compará-lo com os métodos tradicionais e explicar o pensamento mais profundo que torna a sondagem uma verdadeira vantagem no chão de fábrica.
O alinhamento do torno com os eixos da máquina não é uma sugestão - é um trabalho de precisão fundamental.
Um torno que está ligeiramente fora:
O ensino tradicional envolve a utilização de um esquadro de maquinista, localizadores de arestas ou indicadores para “sentir e ajustar” até que tudo pareça correto. Isso pode funcionar - mas depende muito do operador e da interpretação manual.
Explorar os aparelhos de ajuste de ferramentas laser CNC sonda cnc.
A borda de uma mesa de máquina - ou mesmo o próprio torno - pode parecer quadrada a olho nu e ao tato, mas ainda assim estar desalinhada alguns milésimos no sistema de coordenadas real. Estes pequenos erros podem propagar-se nas peças acabadas. O esquadro não tem a ver com ser bonito - tem a ver com ser matematicamente preciso em relação aos eixos da máquina.
Métodos tradicionais: O que fazem e os seus limites
Antes das sondas, os maquinistas usavam normalmente um torno de esquadria:
Desliza-se um esquadro ao longo da mesa e ajusta-se até que “pareça” correto. Isto pode aproximá-lo, mas as interpretações variam e os pontos de contacto não são registados pelo controlador.
Indica-se cada face do maxilar até que as leituras coincidam - mas isso continua a exigir um julgamento humano cuidadoso e pode ser entediante em várias configurações de torno.
Útil para encontrar as arestas das maxilas do torno, mas os geradores de arestas continuam a depender da resposta do operador (visual ou tátil) e requerem cálculos manuais de desvio após o facto.
Todos estes métodos podem funcionar, mas têm a mesma limitação: interpretação humana e introdução manual de dados.
Saiba mais sobre os apalpadores tácteis modulares CNC sonda cnc.
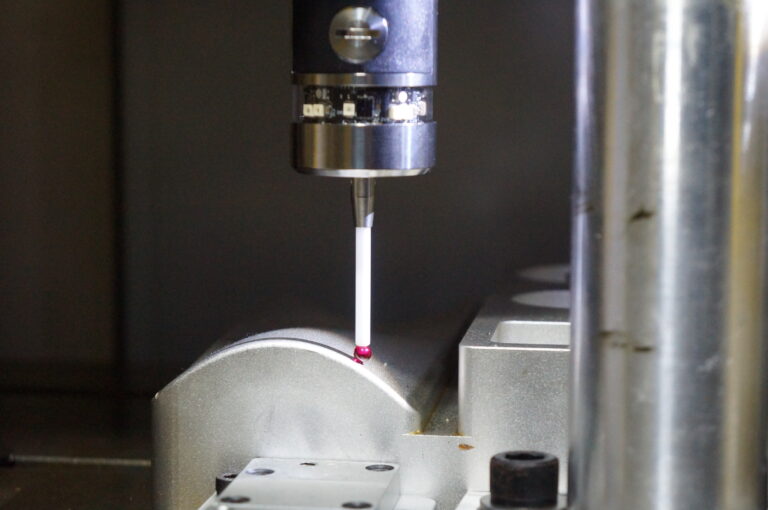
Um apalpador CNC não se limita a tocar nas superfícies - mede-as em relação ao sistema de coordenadas da máquina e fornece esses dados diretamente ao controlador.
Isso significa que:
As sondas são essencialmente ferramentas de medição, e não apenas indicadores tácteis - a própria máquina torna-se o seu instrumento de pesquisa.
Verificar os apalpadores com fio para transmissão CNC sonda cnc.
Eis uma rotina de sondagem prática e humanizada que pode adotar:
Antes de efetuar a sondagem, certificar-se de que:
Porquê? Porque a sondagem pressupõe que o stock é acessível e alcançável. Se as aparas, os detritos ou o desalinhamento bloquearem os caminhos, os movimentos de apalpação podem fornecer dados falsos ou mesmo falhar.
Esta etapa preparatória é algo que os métodos tradicionais também salientam - a limpeza e a montagem sólida são verdades universais.
É aqui que a magia começa:
O controlador pode agora calcular a largura do mordente em relação ao eixo da máquina e calcular um valor de correção.
Isto faz com que o alinhamento seja feito matematicamente e não pelo tato.
Este par de eventos de contacto elimina o trabalho de adivinhação sobre onde estão realmente as arestas.
Visite a página inicial do CNC Probe sonda cnc.
Repetir a mesma ideia em Y:
Agora a máquina tem dois eixos de medições reais.
Em vez de interpretar as oscilações do mostrador ou os pontapés nas extremidades, está a deixar a máquina criar um verdadeiro mapeamento de coordenadas dessas superfícies.
Saiba mais sobre as sondas CNC de medição de alta precisão sonda cnc.
Uma vez recolhidos os dados, o responsável pelo tratamento utiliza-os para:
Esta última parte - saber até que ponto as coisas estavam erradas - é um dos maiores valores ocultos da sondagem. Dá-lhe confiança no que está a fazer e um registo que pode reutilizar mais tarde.
Explorar os aparelhos de ajuste de ferramentas com fio do eixo Z do CNC sonda cnc.
Quando alguém utiliza um localizador de arestas ou um indicador, a máquina não armazena nada - o maquinista traduz mentalmente um evento mecânico em desvios de coordenadas. É nessa tradução que reside o erro.
Com uma sonda:
Isto elimina o enviesamento do operador e torna o alinhamento um facto medido e não uma aproximação humana.
Verificar os produtos de sondas CNC sonda cnc.
Embora as rotinas de sondagem sejam poderosas, não salvam uma configuração mal preparada:
A sondagem não é mágica - é uma medição precisa - o que significa que os seus dados (fixação, limpeza, calibração) também têm de ser precisos.
| Fator | Localizador de arestas | Sonda CNC |
|---|---|---|
| Facilidade de utilização | Fácil, tátil | Requer programação e configuração |
| Exatidão dos dados | Dependente do operador | Controlador medido |
| Repetibilidade | Variável humana | Consistência da máquina |
| Documentação | Em grande parte manual | Armazenado automaticamente |
| Curva de aprendizagem | Baixa | Moderado |
| Melhor caso de utilização | Alinhamento rápido em bruto | Configurações de precisão e trabalhos repetidos |
Uma sonda não está aqui para substituir totalmente os localizadores de arestas - estas ferramentas ainda têm valor em configurações manuais rápidas - mas quando se compromete com a precisão e a repetibilidade, a sonda ganha de mão beijada.
Imagine que a sua equipa trabalha em dois turnos. Com indicadores e localizadores de arestas, a interpretação de cada operador pode variar. Os desvios das peças podem mudar ligeiramente da noite para o dia, especialmente se a fixação for reutilizada.
Com sondagem:
Isso significa consistência, confiança e menos repetição de passos.
Os apalpadores de arestas e os indicadores são ferramentas - excelentes nas mãos certas - mas dependem da interpretação humana. As rotinas de sondagem, no entanto, dependem da medição da máquina. Isto transforma o esquadrejamento de um torno de uma arte numa ciência previsível.
Se a sua oficina tem como objetivo a repetibilidade, a auditabilidade e a qualidade a longo prazo, a quadratura com uma sonda não é apenas uma conveniência - é uma atualização fundamental do fluxo de trabalho.