Talk to us,Get a Solution in 20 minutes

Please let us know any requirements and specific demands,then we work out the solution soonest and send back it for free.

Product inquiry

CNC Touch Probe Stylus — Ruby Ball Stylus Selection (Diameter vs. Accuracy)

If you’ve ever blamed your CNC touch probe for “random” measurement errors, there’s a good chance the real culprit is much simpler: the stylus you chose (or inherited) isn’t matched to the job.

Most shops treat ruby ball stylus selection like a footnote: “use 3 mm for small stuff, 6 mm for general.” That’s how you end up chasing tenths that aren’t actually in the machine. The stylus is the first mechanical interface between your part and your probe. It’s where geometry, stiffness, surface physics, and measurement strategy collide.

This guide goes deeper than the usual “bigger = stronger, smaller = more accurate” take. We’ll unpack what really changes when you change ruby ball diameter, how to predict tradeoffs before you cut metal, and how to choose a stylus that behaves the same way your inspection plan assumes.


Probe Stylus

1) What a Ruby Ball Stylus Actually Does (Beyond “Touching the Part”)

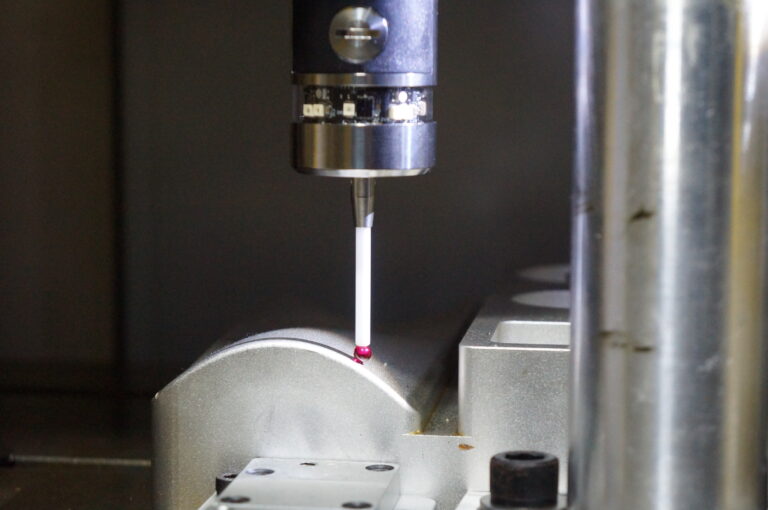
A CNC touch probe stylus is a springy mechanical system:

  • Ruby ball (the contact point)
  • Stem (usually tungsten carbide or ceramic)
  • Stylus threads / coupling (M2/M3/M4 etc.)
  • Probe kinematics / trigger mechanism inside the probe body

When you contact a surface, you don’t just “detect a point.” You’re creating a controlled deflection until the probe triggers. The probe reports a position at trigger time, and your control assumes that position corresponds to the surface.https://cnc-probe.com/cnc-probes-stylus/

But between “ball touches surface” and “probe triggers,” several subtle things happen:

  • The stylus deflects (bending and micro-slip)
  • The ball experiences Hertzian contact deformation (tiny flattening at the contact zone)
  • The surface can cause stick-slip if it’s rough, oily, or has a burr
  • The trigger mechanism may respond slightly differently depending on direction and speed (pre-travel variation)

Stylus diameter influences every one of those, directly or indirectly.


2) The Myth: “Smaller Ball = Higher Accuracy”

Smaller balls can reach tight features, but they’re not automatically more accurate.

A smaller ball usually means:

  • Shorter radius → easier to probe tight pockets, fillets, small holes
  • Potentially lower probing force required to reach feature (depending on strategy)
  • But often paired with a thinner stem → more bending
  • More sensitive to surface roughness and contamination (tiny contact patch is less forgiving)

In many real setups, a small ball gives you better access but worse repeatability—especially on-machining probing where coolant, chips, and surface texture are part of life.

Accuracy is less about ball size alone, and more about the stability of the contact event.


Probe Stylus

3) What Changes When Ball Diameter Changes?

A) Feature Access and “Effective Geometry”

Ball diameter controls what you can physically measure without collisions.

  • Small ball (e.g., 1–3 mm):
    • Fits into small holes and narrow pockets
    • Better for small bosses, micro features, delicate geometry
    • Higher risk of false contacts (chips, burrs)
  • Medium ball (e.g., 4–6 mm):
    • Best “general purpose” range for many mills
    • Decent stiffness, decent access
  • Large ball (e.g., 8–10 mm+):
    • Great for deep cavities, rough surfaces, castings
    • Better averaging over texture
    • May not fit into tighter features and can “bridge” over small radii

Human shop truth: if your probing routine assumes perfect access but your stylus can’t reach the true surface normal, your measured “point” becomes a guess.


B) Stiffness, Deflection, and Repeatability (The Real Accuracy Drivers)

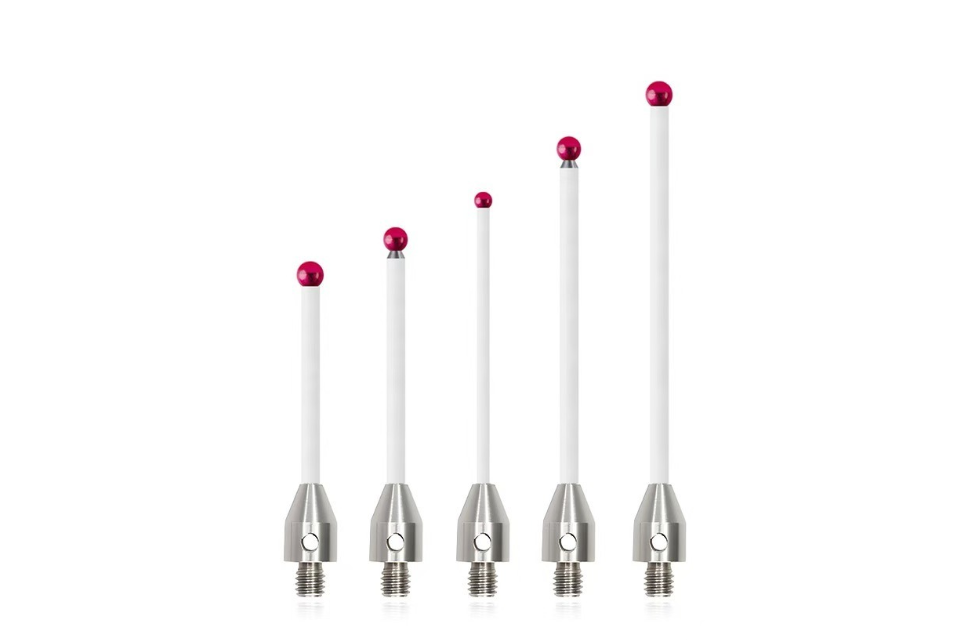
The ball itself isn’t what bends—the stem bends.

But ball diameter influences stem selection and overall stylus length, which changes stiffness dramatically.

  • Longer stylus = exponentially more bending
  • Thinner stem = far more bending
  • A small ball often implies a thin stem and sometimes longer reach (because you’re probing tight spots), so errors stack.

Rule of thumb you can trust:
If you need reach, prioritize shorter and stiffer over “small ball = accuracy.”

If you must go small, keep it short and avoid aggressive probing vectors.


C) Surface Texture, Burrs, and Coolant Film

Ball diameter changes how “stable” the contact is.

  • On rough surfaces, a small ball “falls” into peaks and valleys more dramatically.
  • On burrs, a small ball catches more easily and can trigger early.
  • On oily/coolant-wet surfaces, the contact event can be more variable; larger balls often behave more consistently.

Translation:
If you probe as-machined surfaces (not cleaned inspection artifacts), a slightly larger ball can actually improve real-world consistency.


D) Contact Stress and Wear

Ruby is hard and wear-resistant, but not magical.

Smaller balls concentrate force into a smaller contact patch, increasing stress on both the ball and the part’s micro-peaks. Over time:

  • Micro-chipping risk rises (especially if you probe sharp edges)
  • Surface debris embeds or transfers
  • The ball can polish unevenly and subtly change contact behavior

Large balls spread contact over a larger area, reducing peak stress and making the contact event less “spiky.”


E) Pre-Travel Variation (Trigger Direction Sensitivity)

Touch probes have internal mechanics that cause slight differences in trigger point depending on direction. Ball diameter doesn’t eliminate this, but it influences how sensitive your probing is to surface micro-effects that “start the deflection.”

A stable contact event (often helped by a stiffer stylus and appropriate diameter) reduces variability in when that trigger happens.


4) Diameter vs. Accuracy: What “Accuracy” Do You Mean?

Shops mix these up:

  1. Repeatability: do you get the same result when you probe the same feature multiple times?
  2. Trueness (system error): is your measured value aligned with reality after calibration/comp?
  3. Practical accuracy in-process: does probing still work when coolant, chips, and vibration exist?

Ball diameter choices affect #1 and #3 far more than people expect. #2 can often be “calibrated out” only if the behavior is consistent. If the stylus bends differently run-to-run, no calibration can save you.


Probe Stylus

5) Choosing Stylus Diameter by Application (Practical Matrix)

General milling setups (80% of shops)

  • 4–6 mm ruby ball
  • Shortest possible length
  • Carbide stem unless you need electrical isolation or special environments

Why this works: good stiffness, decent access, forgiving contact.https://cnc-probe.com/cnc-probes-stylus/


Small holes, narrow slots, fine geometry

  • 1–3 mm ruby ball
  • Keep it short; avoid long skinny stems if you can
  • Use reduced probing speed and avoid probing near burr-prone edges

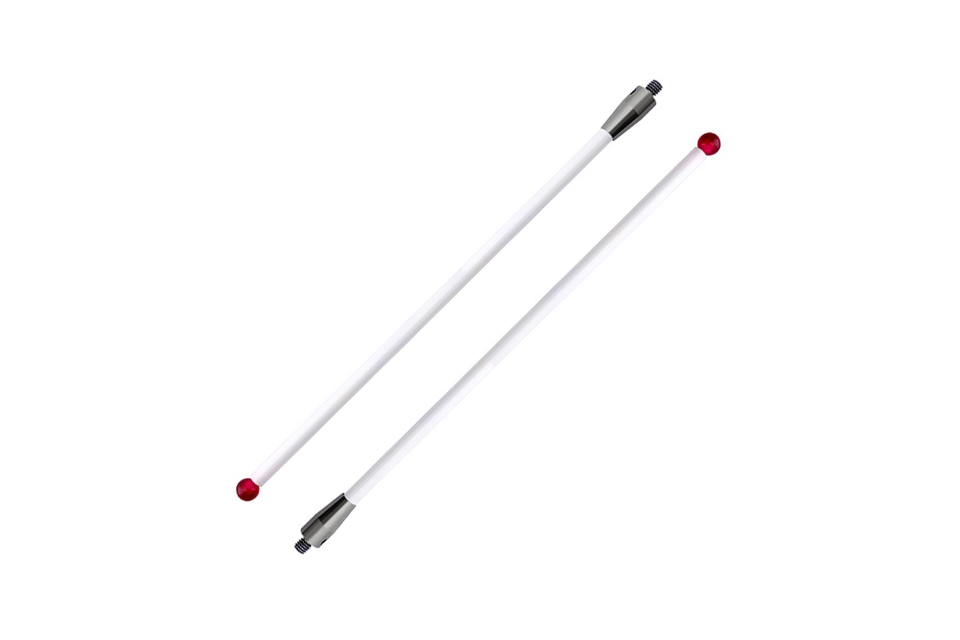
When it fails: deep pockets + long reach + thin stem = “it measures different every time.”https://cnc-probe.com/m4-cnc-probe-stylus-50mm-carbide-stem-and-3mm-ruby-ball-tip/


Deep cavities, 5-axis work, awkward access

You may think you need a smaller ball. Often you actually need:

If reach is unavoidable:

  • Increase diameter or stem stiffness to keep deflection under control
  • Reduce probe approach speed and ensure clean coolant management

Rough castings / forged parts / textured surfaces

  • 6–10 mm ruby ball
  • Helps average texture and avoid “random” trigger scatter

This is where bigger truly can mean “more accurate” in practice.


6) The Hidden Factor: Ball Diameter Changes Your “Edge Math”

If you probe near edges or chamfers, the ball radius affects where your contact points land.

Two common mistakes:

  • Probing too close to an edge with a large ball and accidentally contacting the chamfer
  • Probing a small hole with a large ball that “rides” higher due to geometry

Fix: program probing points with enough clearance that the ball contacts the intended surface, not a transition feature.


7) A Simple Decision Framework That Actually Works

Ask these in order:

Step 1: What’s the smallest feature you must enter?

  • If your smallest hole/slot demands ≤3 mm ball, you’re constrained—go small.

Step 2: How much reach do you need?

  • If reach is long, the priority becomes stiffness.
  • Consider stepping up diameter or stem thickness rather than going tiny.

Step 3: What surface condition are you probing?

  • As-machined + coolant + chips → lean slightly larger
  • Clean inspection-like surfaces → smaller works better

Step 4: How tight is the tolerance you’re trying to control?

  • If you’re chasing tight process control, repeatability is king.
  • Choose the diameter that gives stable contacts, not theoretical “resolution.”

8) Pro Tips Competitors Usually Don’t Mention

Tip A: “Shorter beats smaller” for accuracy

If you can reduce stylus length by 20–30%, you often gain more repeatability than changing ball diameter.

Tip B: Match stylus diameter to probing strategy

  • For bore probing, small balls can be great if stiffness is maintained
  • For planar probing on rough surfaces, larger balls reduce scatter

Tip C: Burr control matters more than people admit

A perfect stylus can’t measure through a burr consistently. Deburr critical probe points or adjust contact locations away from burr-prone areas.

Tip D: Calibrate the stylus you actually use

Switching stylus diameter without updating calibration is like changing a tool length and ignoring offsets.

Tip E: Don’t probe like it’s inspection metrology

On-machine probing is in a hostile environment. Build routines that are robust: controlled speed, consistent direction, and realistic expectations.


If you want a pragmatic starting kit:

  • 6 mm ruby ball, short carbide stem → workhorse for most milling
  • 3 mm ruby ball, very short stem → small features
  • 8–10 mm ruby ball → rough surfaces / castings / deep cavities

Then refine based on the feature access and stiffness demands of your specific parts.


10) Bottom Line

Stylus diameter is not a “bigger vs. smaller” argument. It’s a contact stability vs. access optimization problem.https://cnc-probe.com/cnc-probes-stylus/

  • Need access? Go smaller—but keep it short and controlled.
  • Need consistent process control? Favor stiffness and contact stability—often medium to larger balls win in the real world.
  • Probing in coolant and rough surfaces? Larger balls can produce more reliable results even if they feel “less precise” on paper.

If you treat stylus selection like an engineering decision instead of a catalog checkbox, your probe stops being a source of mystery and becomes what it should be: a trustworthy feedback tool inside your machining process.

Comments

Blank Form (#5)
Share your love