Talk to us,Get a Solution in 20 minutes
Please let us know any requirements and specific demands,then we work out the solution soonest and send back it for free.
Please let us know any requirements and specific demands,then we work out the solution soonest and send back it for free.
If you’re using a touch-trigger probe (on a CMM, shop-floor CMM, or probing on a CNC), “repeatability” is the canary in the coal mine. When repeatability drifts, your results can still look believable—until a critical tolerance goes sideways and nobody can explain why.
This post gives you a fast, shop-friendly repeatability test you can run in minutes, plus a deeper, more diagnostic routine you can run weekly/monthly. The goal is simple: detect change early, identify whether it’s probe/stylus/qualification/environment, and keep your measurement system trustworthy.
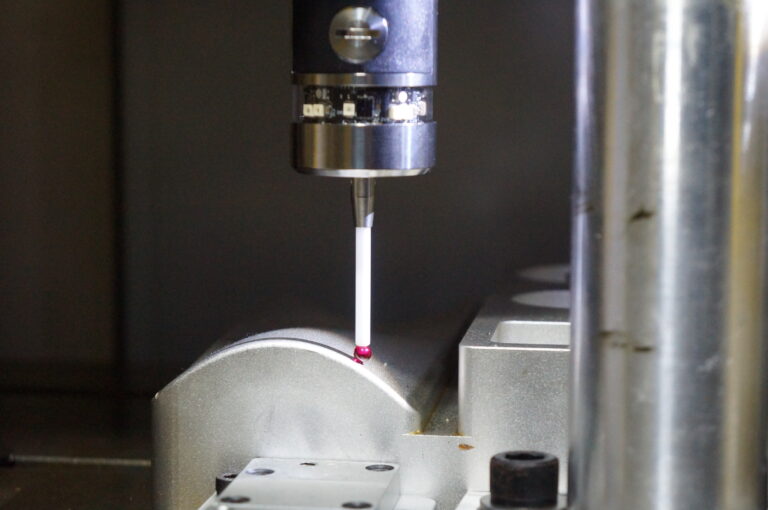
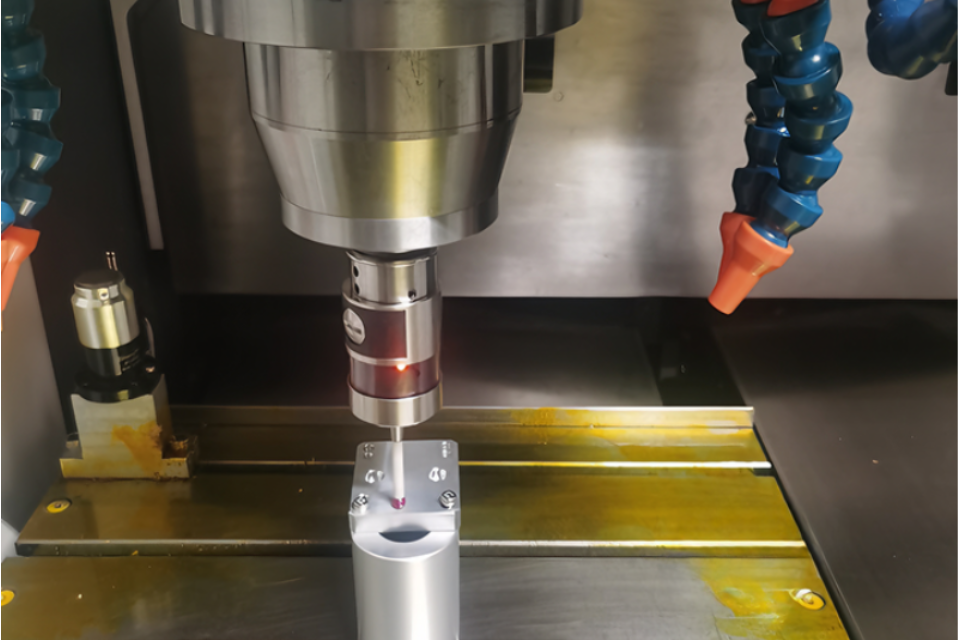
Repeatability is the probe’s ability to produce closely similar results when you measure the same thing the same way under the same conditions. Standards commonly express this by repeating measurements of a precision sphere and looking at the range (max–min) of the resulting coordinates—often across X, Y, and Z—with the largest range reported as repeatability. https://cnc-probe.com/cnc-touch-probes/
Why a sphere?
A calibrated reference sphere is stable, symmetrical, and easy to probe consistently. It’s also the standard artifact used for probe performance checks and qualification. https://cnc-probe.com/presition-cnc-calibration-sphere-ceramic-standard-ball-probe-gauge/
This mirrors common sphere-repeatability concepts used in practice and in standard-style definitions (repeat center coordinates multiple times and evaluate ranges). https://cnc-probe.com/presition-cnc-calibration-sphere-ceramic-standard-ball-probe-gauge/
Hexagon’s practical guidance aligns with this: qualify normally, then measure the same sphere with at least 25 points, repeat multiple times, and compare to your baseline.
These steps are not optional if you want a repeatability number you can trust:
Step 1 — Qualify the probe (normal qualification)https://cnc-probe.com/cnc-touch-probes/
Step 2 — Measure the sphere using a consistent pattern
A simple, stable pattern is:
This “5 touches” pattern is commonly used in practical repeatability checks.
Step 3 — Repeat the exact same measurement 10 times
Step 4 — Record the sphere center (X, Y, Z) each cycle
Most metrology software will output the fitted sphere center. If yours doesn’t, export feature results.
Step 5 — Calculate repeatability
For each axis:
Repeatability = max(RangeX, RangeY, RangeZ)
This “largest coordinate range” reporting is a standard-style way repeatability is communicated in common practice literature.
Use a baseline-based control limit, because “good” depends on your machine, stylus, and environment:
This is often more effective than chasing a spec sheet number, because it catches change—the thing that breaks inspection processes.
When you need a more sensitive check (weekly/monthly, after a probe crash, after stylus change, or when Level 1 starts creeping up), run a 25-point sphere measurement, repeat it 3+ times, and compare results to your baseline.
Because a denser, well-distributed point set makes it harder for a “marginal” probe qualification or direction bias to hide. Many probing performance approaches evaluate the form deviation of the measured sphere using all points (don’t “throw out outliers” just to make the report pretty).
Track at least:
If form worsens but center repeatability stays okay, you may be looking at directionality, qualification strategy, or stylus dynamics—not just “noise.”
Probe Repeatability Log — Level 1 (10-cycle sphere center)
| Cycle | X center | Y center | Z center |
|---|---|---|---|
| 1 | |||
| 2 | |||
| … | |||
| 10 |
Calculated:
Disposition:
Common failure mode: stylus loosens slightly and repeatability explodes.
If you qualify with too few points and test with many points, you can create self-inflicted “performance failures.” A higher-density qualification is often recommended before deeper sphere tests.
If the probe fails to re-arm reliably, or if trigger force is set too low, repeatability can degrade.
Renishaw’s troubleshooting guidance includes adjusting trigger force to the minimum necessary for reliable triggering and reviewing stylus mass/length.
If repeatability drifts with time-of-day, suspect temperature gradients, airflow, vibration, or axis motion issues. Standards-style repeat testing exists for a reason: the system is a combination of probe + machine + environment.
A practical schedule that doesn’t annoy production:
Most shops run a check, glance at a number, and move on. The shops that win do one extra thing:
They trend it.
A simple run chart of your Level 1 repeatability value will show:
That’s how you catch measurement risk before it becomes scrap, RMAs, or customer returns.