Talk to us,Get a Solution in 20 minutes
Please let us know any requirements and specific demands,then we work out the solution soonest and send back it for free.
Please let us know any requirements and specific demands,then we work out the solution soonest and send back it for free.
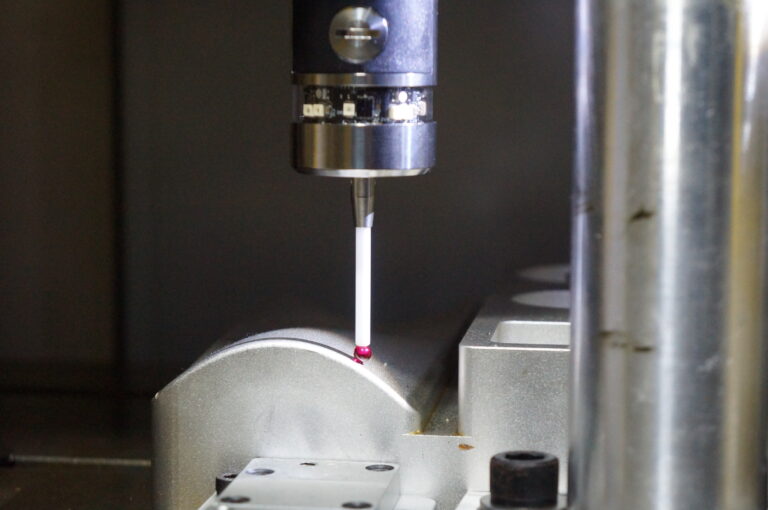
Touch probes can ensure accurate measurements, safe setups, and consistent quality. But when a touch probe stops short of the intended contact point, or triggers prematurely, it will makes us feel confuse: the machine thinks something happened…but we can’t see it. So Understand whether the root cause is electrical or mechanical is important—not just to fix the issue, but to prevent it from reoccurring. Here’s an expert breakdown that connects human intuition with machine behavior.
What is touch probe “stops short” ? It means that the machine retracts, halts, or signals a trigger before the touch probe actually makes solid, reliable contact with the surface or feature it’s supposed to measure. Instead of completing the expected movement, the cycle ends early. This can manifest as:
The probe retracts before touching the part.
A trigger signal is registered too soon.
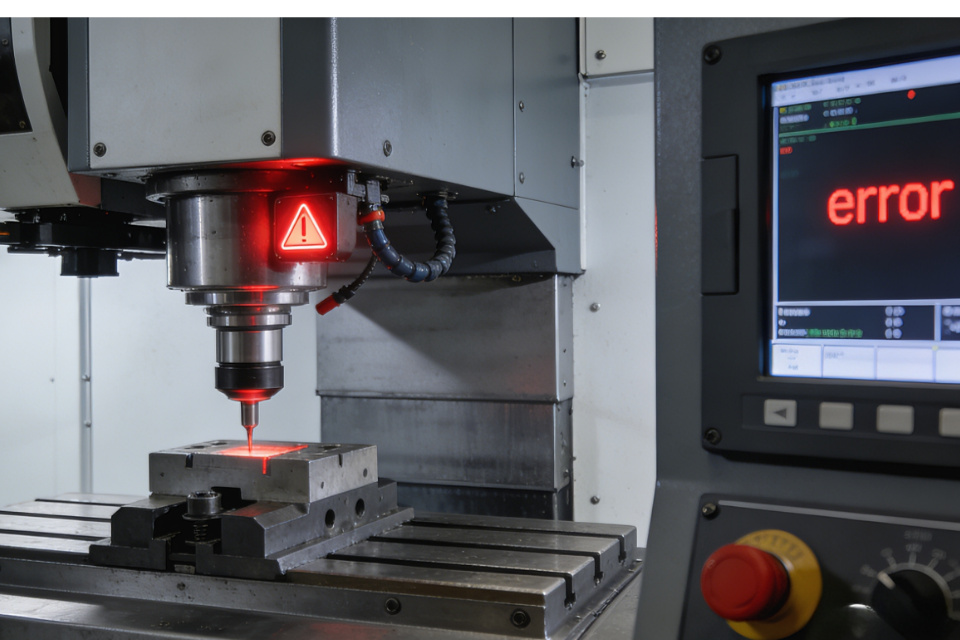
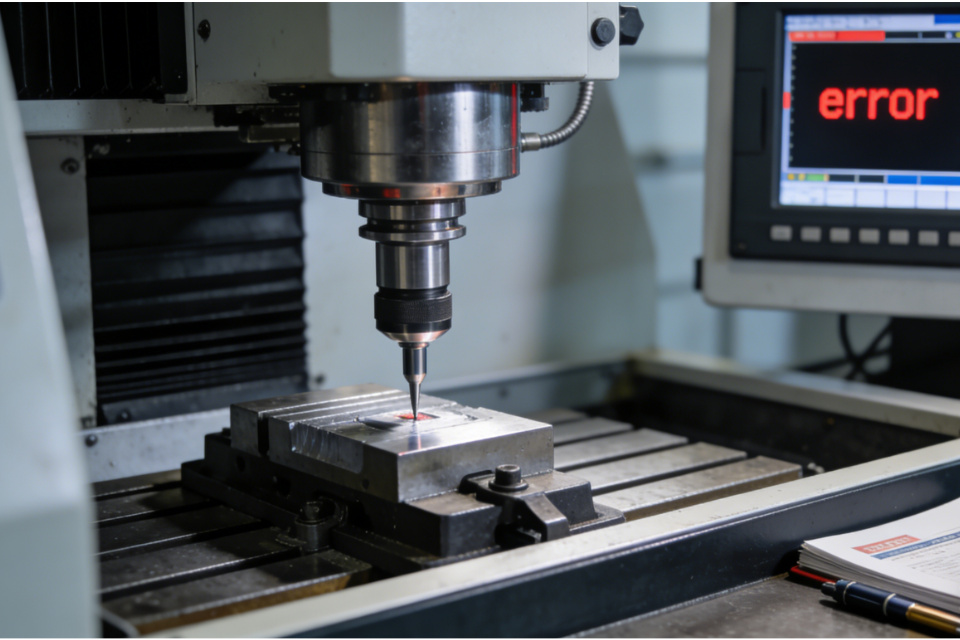
The machine issues an error mid-cycle.
Measurement results are inconsistent or inaccurate.
To solve this, you need to distinguish between electrical causes and mechanical causes—and sometimes both interact to create confusion.
Electrical issues often show up as false triggers or unstable signal interpretation. Because modern probes rely on detecting tiny changes in electrical state (closed circuit, voltage changes, logic signals), anything that disturbs that signal can make the system think a contact has occurred—even when it hasn’t.
Loose, intermittent, or poorly crimped connections can generate false contact signals. And frayed wires or poor shielding will allow electrical noise to influence the probe input. This isn’t always obvious—sometimes a cable looks intact, but under movement the signal fluctuates.
Check cable integrity from probe head to controller.
Reseat connectors and verify tight crimps.
Avoid routing probe cables near high-power wiring.
These simple steps often eliminate unexplained early trigger events.
In a workshop full of motors, drivers, and high-current lines, electrical “noise” is a real threat. If the probe’s signal is interpreted through a noisy circuit, even a slight interference spike can mimic a trigger.
Proper grounding and shielding are essential.
Long cable runs without ferrites or shields increase sensitivity.
Power surges or poorly conditioned electricity make things worse.
A poorly grounded system reacts to stray electrical currents, causing the probe input to behave erratically.
Unexpected fluctuations in voltage—either from the machine’s power source or from within the controller—can muck up the logic used to detect a probe signal. If the controller sees a voltage change on the probe line, it may assume a touch event occurred.
Use surge protection or filtered power supplies.
Inspect controller PCB for loose contacts or corrosion.
These electrical symptoms can mimic mechanical failure, which is why many technicians misdiagnose early trigger behavior.
Even though electrical noise can fool the system, many problems are genuinely mechanical, the machine isn’t truly detecting the surface, it behaves as though it has.
Mechanical parts like styluses, springs, and contact plates wear down with time goes by. This alters the probe’s trigger point in ways that aren’t always visible to the eye. Because slight wear can make the stylus deflect differently, resulting in inconsistent trigger distances. So regular inspection and maintenance help avoid these silent shifts.
If a touch probe isn’t aligned perfectly with the surface or its mount isn’t secure, the geometry will changes. When the machine approaches a surface at the programmed speed and trajectory, the contact forces may not activate the trigger mechanism as intended,even if it looks like contact.
Verify mount alignment.
Tighten probe holders and adapters.
Ensure proper orientation per manufacturer instructions.
Mechanical mounting issues are surprisingly common and often overlooked.
Because dust, chips, coolant residue, or lubricant on the stylus or contact surfaces can prevent clean mechanical contact. This can cause the probe’s deflection to behave unpredictably.
A simple cleaning routine goes a long way toward consistent probing results.
Here’s the key insight most competitors miss: electrical failures and mechanical failures produce similar symptoms, but require very different solutions. A touch probe seems to stop short because of an electrical glitch cannot be fixed by tightening a screw.
Think of it like the difference between a nervous reflex (electrical) and a worn hinge (mechanical): one needs signal correction, the other physical repair.
Inspect all probe wiring, connectors, shields.
Check grounding integrity.
Look for intermittent continuity.
If problems improve when jiggling wires or rerouting cables, the root is likely electrical.
Inspect stylus and contact surfaces for wear.
Check mount alignment and tighten fixtures.
Clean probes from debris.
If precise manual contact triggers normally but automatic probing doesn’t, mechanical issues are likely.
Confirm correct probe configuration in control firmware.
Validate contact speed, sample intervals, and debounce logic.
Sometimes the machine’s interpretation of the probe signal is affected by software timing, which sits between electrical and mechanical realms.
When you diagnose whether your probe is reacting to noise or reality, you shift from firefighting to engineering. In both manufacturing and precision metrology, the value isn’t just in solving the current error—you’re building confidence that tomorrow’s results will be just as accurate.
Understanding why a probe stops short means respecting both the electrons that talk to your controller and the metal components that touch your workpiece. In a sense, a probe is both electric and tactile—and the best diagnostics respect that dual nature.
Contacthttps://cnc-probe.com/contact-us/ team if you need more detailed information.